
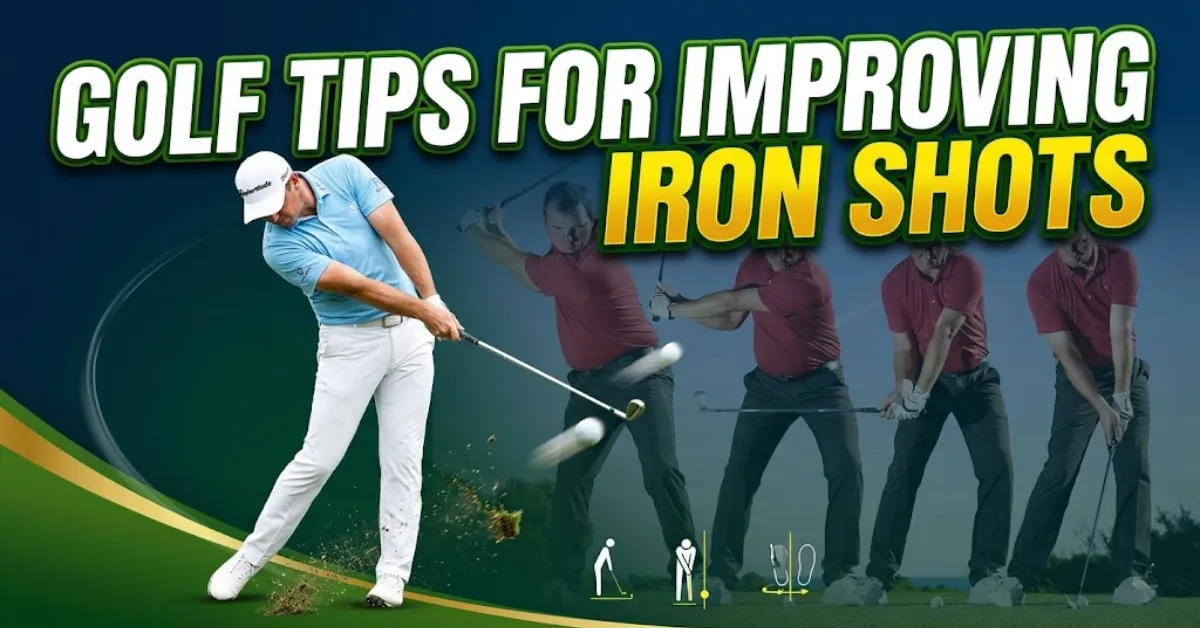
Most golfers dread pulling a long iron out of the bag. The good news is that these golf tips for improving iron shots do not require a complete swing overhaul. In almost every case, a few targeted fixes to your setup, swing path, ball position, and contact point are all you need to start flushing it. Whether you are chunking it fat, skimming it thin, or just struggling to find that satisfying compressed strike, this guide covers everything. Work through each section in order, take two or three drills to the range, and you will notice a real difference the next time you step on the course.
The Most Common Iron Mistakes Golfers Make (And Why They Happen)
Before jumping into fixes, it helps to understand why iron shots go wrong in the first place. Most bad iron contact comes from one of three root causes:
1. The low point of your swing is behind the ball. This means the club is already on its way back up when it reaches the golf ball. The result is a fat, heavy shot or a thin, topped strike depending on exactly where contact happens.
2. Your swing path is too steep. A steep, chopping motion digs the leading edge into the turf and kills distance. It also makes it almost impossible to shallow out your angle of attack.
3. Your body stops rotating through impact. When your hips and torso slow down, your hands flip to compensate. This leads to inconsistent face angles, poor compression, and a complete loss of control.
Everything covered in this article traces back to one of these three problems. Once you know which one affects you most, the fixes below become far easier to apply.
How to Hit Irons Pure: Fix Your Setup First
Good iron shots are built from the ground up. Before you worry about your swing path or your release, your setup needs to be right. A poor setup makes solid contact nearly impossible, no matter how good your swing is.
Ball Position for Every Iron
Ball position is the single most misunderstood part of iron setup. Most amateurs play the ball too far forward for mid and short irons, which forces a shallow or upward strike — exactly what you do not want.
Here is the correct ball position for each iron group:
A simple way to find your ball position consistently: stand with your feet together, place the ball in the centre, then step your lead foot forward and your trail foot back to your normal stance width. The ball ends up in roughly the right position for a mid-iron every time.
Posture and Weight Distribution
Set up with your knees slightly flexed, your hips hinged forward (not bent at the waist), and your spine in a neutral position. Your weight should be distributed evenly across both feet — about 50/50. You want to feel pressure through the balls of your feet, not your heels.
Your hands should sit just slightly ahead of the ball at address. This forward shaft lean is not extreme — just enough that you can see the back of your left hand is slightly in front of the ball. This pre-sets the impact condition you are trying to create.
Grip Pressure and Hand Position
Keep your grip pressure at around a 5 out of 10. Squeezing too hard tightens your forearms and kills the natural release. Your left hand (lead hand) controls the club face — make sure the grip runs diagonally across the fingers, not across the palm.
How to Line Up for Iron Shots the Right Way
Alignment is one of the most overlooked golf tips for improving iron shots, yet it affects every shot you hit. Poor alignment forces your body to make compensations mid-swing to get the ball on target — and those compensations usually cause bad contact.
The Intermediate Target Method
This is the most reliable alignment method used by tour professionals. Here is how to do it:
- Stand 3–5 metres behind your ball and look directly down your target line
- Pick a spot on the ground 30–60 cm in front of your ball — a blade of grass, a divot, a discoloured patch of turf — that sits exactly on the line between your ball and your target
- Walk in and set your clubface square to that intermediate target first
- Then position your feet, hips, and shoulders parallel to the same line
This two-step process removes the guesswork from alignment completely. Most golfers aim right of their target without realising it. If you have never done this before, grab an alignment stick and lay it on the ground at your next range session – the results are usually an eye-opener.
Check Your Shoulder Alignment
One of the biggest alignment problems is open shoulders at address. Your shoulders should be parallel to the target line, not aiming left of it (for right-handed golfers). Open shoulders create an out-to-in swing path, which leads to pulls, cuts, and topped shots. A quick check: if you can see your lead shoulder in your peripheral vision at address, your shoulders are too open.
Struggling to Hit Irons? Fix Your Swing Path First
If you are consistently hitting fat shots, thin shots, or shots that fly low and left (for right-handed golfers), your swing path is the most likely culprit. The correct path for iron shots is slightly inside-out — meaning the clubhead approaches the ball from slightly inside the target line and exits to the right of the target.
Why an In-to-Out Path Works
An inside-out swing path does two things. First, it shallows out your angle of attack, which means the club approaches the ball from a flatter angle rather than chopping steeply downward. Second, it naturally encourages a slight draw, which adds distance and keeps the ball in the fairway.
An over-the-top, outside-in path — the classic slice move — causes steep, glancing contact that drains power and makes it nearly impossible to compress the ball.
The Gate Drill (At-Range Drill #1)
This drill trains your swing path in under 10 minutes.
Setup: Place two tees in the ground, slightly wider than your clubhead, creating a “gate.” The first tee goes just outside the ball (on the target-side), the second goes just behind and inside the ball (on the trail-side). The gate angles slightly to represent your target inside-out path.
Goal: Swing the clubhead through the gate without knocking over either tee. If you hit the outer tee, your path is too steep or outside-in. If you clear both tees, your path is on track.
Do this for 20 swings before hitting balls. You will feel the club shallowing out almost immediately.
The Easiest Way to Hit Irons — Ball-First Contact Is Everything
The single biggest difference between a golfer who hits their irons well and one who does not is ball-first contact. When you hit the ball before the ground, you get compression, distance, and accuracy. When you hit the ground first, you get a chunked shot and a frustrated walk to your ball 40 yards short.
How to Compress the Golf Ball
Compression happens when you arrive at impact with your hands slightly ahead of the ball and the clubface descending into the back of the ball. Here is what that looks like in practice:
- At impact, your left hand (for right-handers) leads the clubhead
- Your hips have rotated slightly open toward the target
- Your weight has shifted onto your front foot
- Your divot starts AT or just in front of the ball, not behind it
If your divot consistently starts behind the ball, the low point of your swing is too far back. The fixes below address this directly.
The Tee Drill for Ball-First Contact (At-Range Drill #2)
This is one of the most effective drills for fixing early contact.
Setup: Place a tee in the ground approximately 1–2 cm in front of your ball. Do not push it all the way down — let it sit just above the turf.
Goal: Hit the ball and then clip the tee out of the ground on your follow-through.
Why it works: To clip the tee, you have to make ball-first contact and keep the club moving forward through impact. If you are hitting behind the ball, you will never reach the tee. If you catch the tee before the ball, your low point is still too far back.
Spend 10–15 minutes on this drill every range session for two weeks and you will notice a permanent improvement in ball-first contact.
The Towel Drill (At-Range Drill #3)
Setup: Place a folded towel or headcover on the ground approximately 10 cm behind the ball.
Goal: Make full swings and hit the ball without touching the towel.
Why it works: The towel acts as a visual and physical threat. Your brain naturally adjusts your swing path to avoid it, which forces you to approach the ball from a shallower angle and delay the low point until after the ball. This is a favourite drill among PGA teaching professionals for fixing chunked shots.
Best Iron Swing Mechanics: Tempo, Weight Shift, and the Downswing Sequence
Tempo – The Most Underrated Factor in Iron Play
Almost every golfer who struggles with irons swings too fast on the downswing. A rushed transition destroys your sequencing, throws the club over the top, and makes consistent contact nearly impossible.
Your tempo should feel like a 3:1 ratio — three counts back, one count through. Your backswing should feel almost lazy compared to your downswing. The power in a good iron shot comes from proper sequencing and body rotation, not from swinging the arms faster.
A useful check: if your backswing feels too slow, it is probably about right. Most golfers who complain about losing distance from slowing their backswing actually gain distance because their sequencing improves.
The Correct Downswing Sequence
This is the order your body should move in on the downswing — from the ground up:
- Lead foot pressure — Push into the ground with your left foot
- Hip rotation — Your hips begin turning toward the target
- Torso rotation — Your chest follows your hips
- Arms and hands last — The club arrives at impact as a result of body rotation, not arm speed
The most common mistake is starting the downswing with the hands and arms. This throws the club over the top, creates a steep angle of attack, and leads to pulls and slices. If you start the downswing by pushing into the ground and rotating your hips first, everything else tends to fall into place.
Proper Weight Transfer
Your weight should shift from roughly 50/50 at address to approximately 70% on your front foot at impact. This forward weight shift is what allows the club to bottom out after the ball, not behind it.
A drill to feel proper weight shift: hit shots with your trail foot on its toe at impact (like a flamenco dancer’s back foot). If you can finish with your weight on your front foot and your back heel off the ground, you are shifting correctly.
Golf Tips for Improving Iron Shots: How to Stop Chunking
Fat, chunked shots are arguably the most frustrating miss in golf. The ball barely moves, your hands sting, and the divot is the size of a welcome mat. Here is exactly what causes them and how to fix each cause.
Cause 1 – Ball Too Far Forward in Your Stance
When the ball sits too far forward (toward your left foot), you are forced to hit it on the upswing or with a flat angle of attack. The club bottoms out before the ball on the way back down, causing the chunk.
Fix: Move the ball to the centre or slightly forward of centre for mid-irons. For short irons, the ball should be near the middle of your stance. Use the ball position guide in the setup section above.
Cause 2 – Early Weight Shift to the Trail Side
If your weight moves onto your back foot on the downswing (a move called “hanging back”), your swing bottoms out well behind the ball. This is a classic cause of fat shots.
Fix: Feel like your lead hip bumps slightly toward the target at the start of your downswing. This keeps your weight moving forward and shifts your low point in front of the ball. The towel drill above is perfect for training this.
Cause 3 – Early Wrist Release (The Flip)
When golfers try to help the ball into the air by scooping with their wrists, they throw the lag angle away too early. The club bottoms out behind the ball before it ever reaches impact.
Fix: Focus on maintaining the angle between your lead arm and the club shaft as long as possible. Think about keeping your left wrist flat (not cupped) through impact. A flat left wrist at impact keeps the hands forward and prevents the flip. Rick Shiels demonstrates this brilliantly in his lag-preservation drill — place a ruler or alignment stick along your left forearm and grip so that it extends past your wrist. If your wrist breaks down at impact, the stick digs into your forearm — giving you immediate feedback.
Golf Tips to Stop Thinning Iron Shots
Thin, bladed shots that scream low across the ground come from a completely different problem than chunks — even though both are frustrating misses. A thinned shot means the bottom of the clubface is catching the top of the ball, usually because the club is on its way back up when it reaches impact.
Cause 1 – Ball Too Far Back in Your Stance
When the ball is too far back (toward your right foot), you are forced to make contact earlier in the swing, when the club is still descending steeply. This often leads to either a chunk or a thin depending on exact timing.
Fix: The correct position for most irons is one to two ball-widths inside your left heel. If you have been playing the ball near your right foot for mid and short irons, moving it forward will feel strange at first — but your contact will improve immediately.
Cause 2 – Loss of Posture (Standing Up Through Impact)
If you straighten your spine or rise up through the hitting zone, the bottom of your swing rises with you. The club catches the top of the ball instead of the back of it.
Fix: Focus on maintaining your spine angle from address all the way through impact. Your head should stay at roughly the same height throughout the swing. A simple check: if you can see the divot in front of where the ball was (not behind it), your posture held. If there is no divot, or the divot is thin, your posture likely changed.
Cause 3 – Too Little Bounce on Your Irons
Irons with a very narrow sole and minimal bounce allow the leading edge to dig into the turf. On tight lies especially, this causes thin contact as the leading edge scoops under the ball instead of gliding through.
Fix: If you are consistently thinning shots from firm fairways, check the sole design of your irons. Game improvement irons with wider soles and more bounce are more forgiving on thin lies. If you are playing blade-style irons and struggling with thin shots, it may be worth a club fitting to find a sole design that better matches your angle of attack.
How to Hit Irons: Golf Tips for Beginners Getting Started
If you are relatively new to the game and struggling with your irons, start here before worrying about swing path or compression. These three fundamentals fix the vast majority of beginner iron problems.
Fundamental 1 – Grip the Club Correctly
Most beginners grip the club in the palm of their hands, like a baseball bat. This creates tension throughout the arms and prevents any natural release. The correct grip has the club running diagonally across the fingers of both hands.
Place the grip across the base of your fingers on your lead hand (left hand for right-handers). The heel pad of your hand sits on top of the grip. Your trail hand mirrors this position. When both hands are on correctly, the V-shapes formed by your thumbs and index fingers should point toward your right shoulder.
Fundamental 2 – Stay Balanced Through the Swing
Beginners often try to swing hard and end up falling backward or stumbling forward. Iron shots do not need power — they need balance. A balanced finish position (weight on front foot, belt buckle facing the target, back heel off the ground) is a sign of a controlled, repeatable swing.
Try this: hit five iron shots at 60% effort and focus entirely on finishing balanced. The chances are these shots will fly further and straighter than your full-effort swings.
Fundamental 3 – Trust the Loft
Beginners often try to scoop the ball into the air with their irons, which is the single biggest cause of thin and topped shots. The loft on the club is designed to get the ball airborne. Your job is to hit down on the back of the ball. The club’s loft does the rest.
A helpful thought: try to hit the ball into the ground. This sounds counterintuitive, but golfers who try to hit down into the ball almost always create better, higher contact than those trying to lift it.
Choosing the Right Iron for Your Game in 2026
Your swing mechanics matter — but so does your equipment. Playing the wrong iron for your game makes everything harder.
Game Improvement Irons
These are wider-soled, cavity-back designs with a lower centre of gravity and more offset. They are built for golfers who struggle with consistent contact and want maximum forgiveness on off-centre hits. The Callaway Elyte HL and similar designs in 2026 offer the best combination of forgiveness and distance for mid-to-high handicappers.
Player’s Distance Irons
A middle ground between a blade and a full game improvement iron. These offer some forgiveness but still require reasonable ball-striking ability. Good for single-figure handicappers who want a cleaner look at address but still need some help on mishits.
Blade / Muscle Back Irons
These are for low handicap players with consistent, repeatable swings. They offer maximum feedback (you feel every mishit) and workability, but punish poor contact hard. Not recommended if you are still working on the fundamentals.
Shaft Matters as Much as the Head
Shafts are often ignored by amateur golfers but they are just as important as the club head. If your club’s shaft is too stiff for your swing speed, you will tend to hit it low and right. Too flexible and you will lose control of the face. A proper club fitting — which most golf retailers now offer free with purchase — will identify the correct shaft weight and flex for your swing in 20 minutes.
5 Quick Practice Drills Summary
Here is a summary of all five drills in this article so you can take them to the range:
| Drill | What It Fixes | Time |
|---|---|---|
| Gate Drill (two tees) | Swing path — trains inside-out delivery | 10 mins |
| Tee Drill (tee in front) | Ball-first contact — fixes low point | 10–15 mins |
| Towel Drill (towel behind ball) | Chunking — forces shallower approach | 10 mins |
| Alignment Stick Drill | Alignment — sets correct body lines | 5 mins |
| Trail Foot Toe Drill | Weight transfer — trains forward shift | 10 mins |
Work on one drill per range session. Do not try to fix everything at once.
FAQs – Golf Tips for Improving Iron Shots
The easiest improvement most golfers can make is fixing their ball position. Moving the ball to the centre of your stance for short irons and one ball-width inside your left heel for mid-irons immediately improves contact for the majority of golfers without any swing changes required.
Use the intermediate target method. Stand behind the ball, find a spot on the ground 30–60 cm in front of the ball on your target line, then set your clubface square to that intermediate target first. Then align your body parallel to the same line. This is more accurate than trying to aim at a distant flag directly.
The most common causes are: ball too far forward or back in the stance, shifting weight onto the back foot on the downswing, swinging over the top (outside-in path), and trying to lift the ball instead of hitting down. Start with the setup fundamentals and ball position before working on swing changes.
The five fundamentals that matter most are: (1) correct ball position for each iron, (2) proper forward shaft lean at address, (3) inside-out swing path, (4) maintaining spine angle through impact, and (5) letting the loft do the work instead of scooping.
Straight iron shots come from a square clubface at impact and a neutral swing path. Work on alignment first (open shoulders are the #1 cause of unintentional curves), then focus on a consistent grip pressure and a smooth transition at the top. Rushing the downswing is the most common cause of a face that is open or closed at impact.
Topped shots are most commonly caused by straightening up or rising out of your posture during the downswing. Your head lifts, your spine angle changes, and the club catches the top of the ball. Focus on staying down through impact and keeping your spine angle consistent from address to follow-through.
The towel drill is the most consistently effective drill for eliminating chunked shots. Place a folded towel or headcover 10 cm behind the ball and practice hitting shots without touching the towel. This forces you to shallow out your approach and hit the ball before the turf.
Conclusion – Start Hitting Your Irons the Way You Know You Can
Good iron play is not about having a perfect swing. It is about understanding the cause of your miss and applying the right fix. These golf tips for improving iron shots cover every common problem – from chunking and thinning to alignment and tempo – with specific drills you can take to the range today.
Start with your setup and ball position. Get your alignment right. Then work through the drills one at a time. You will not fix everything in one session, and you do not need to. Even fixing one of the problems covered here will show up in your scorecard.
For more help with your ball-striking, check out Madknows’ full guide to iron selection to make sure you are playing equipment that matches your game – because even the best technique needs the right tools. And if you want to take your short game to the same level, our chipping and pitching guide at Madknows has you covered.
Hit it pure. Score lower. Enjoy the game more.