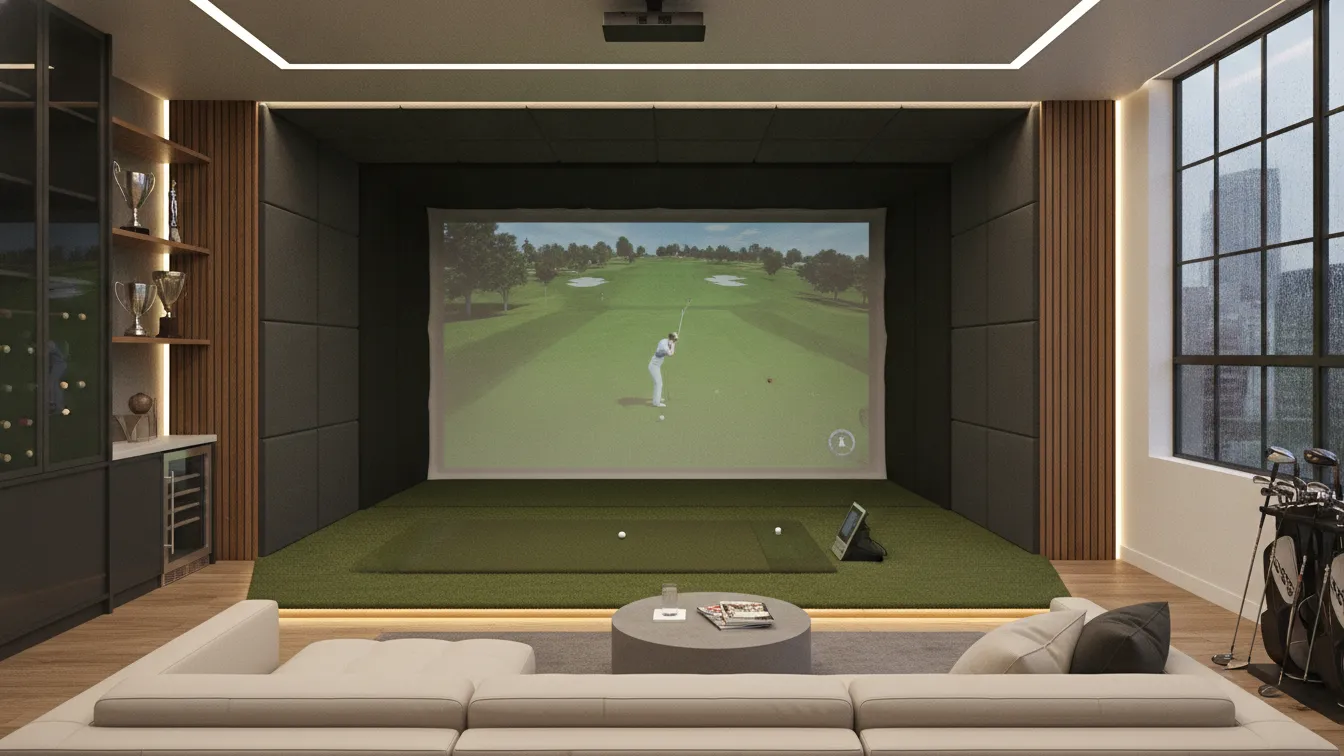
Picture this – you finish work, walk down the hall, and tee off at Pebble Beach without leaving your house. Sounds like a dream, right? A well-planned golf simulator room design can make that a reality, and it doesn’t require a massive budget or a mansion. Whether you’re a weekend warrior or a scratch golfer obsessed with shaving strokes, your indoor golf setup matters more than you think.
This guide is for anyone who wants to build a dedicated golf simulator space that’s functional, good-looking, and genuinely fun to use. I’ll walk you through 20 design ideas that cover everything from launch monitor placement to bar setups, so you can build a room that fits your game and your style.
1. Dedicated Space Planning and Room Layout
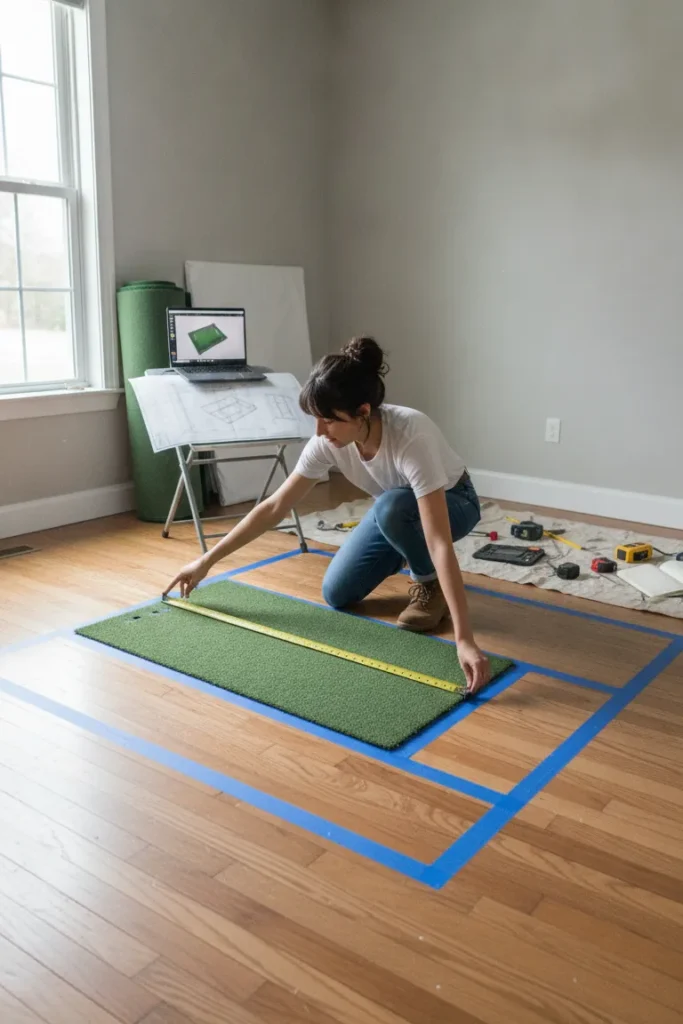
Before you buy a single piece of equipment, room planning is the single most important step in any golf simulator room design project. Most simulators need a minimum footprint of roughly 10 feet wide by 15 feet deep, with ceiling heights of at least 9 feet. Measuring your space accurately – and being honest about what you have – saves you from a lot of expensive headaches down the road.
Sketch out your bay area first, then place the hitting position about 5-8 feet from the impact screen, leave walking room on each side, and account for where your launch monitor will sit. Think about traffic flow, too, because nobody wants to dodge a 7-iron mid-swing.
Pro Tips:
2. Impact Screen Selection
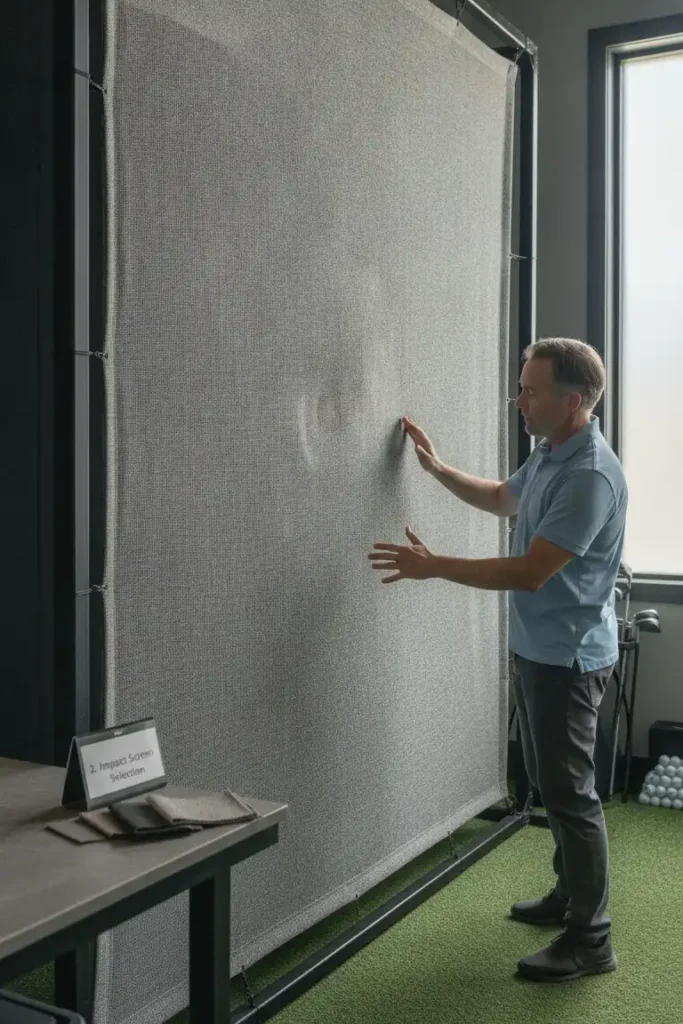
Your impact screen is the heart of the whole setup – it catches the ball, displays your simulation, and takes a beating every single session. High-quality screens made from multi-layer woven polyester handle ball strikes cleanly without tearing or distorting the projected image. Skimping here is a mistake you’ll regret after your third ripped screen in one month.
Look for screens rated for at least 250mph ball speed if you hit with a driver, and pay attention to tensioning too. A sagging or loose screen creates dead spots and distorts the image badly. Frame-mounted screens typically deliver a tighter, cleaner look than hanging-only systems.
Pro Tips:
3. Projector Placement and Throw Distance
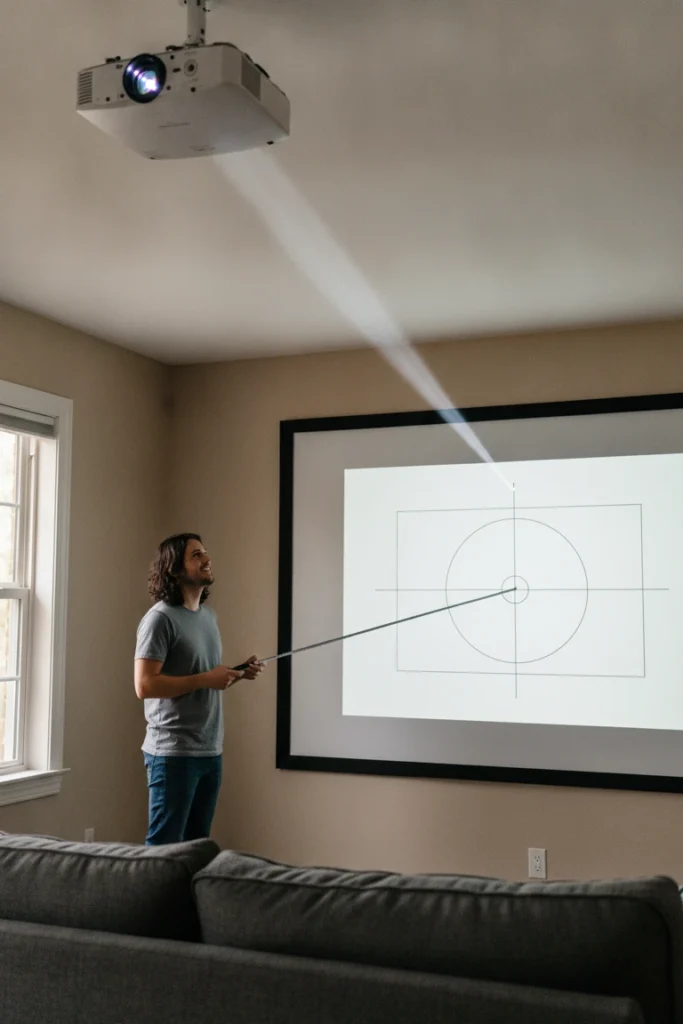
Getting your projector placement right makes the difference between a crisp, bright image and a washed-out, frustrating experience. Most simulator setups use a standard throw projector mounted overhead behind the golfer, though short-throw options work great in tighter rooms. Your projector needs to hit at least 3,000 lumens to compete with ambient light in the space.
Ceiling-mount your projector slightly behind and above the golfer’s head – typically 10-12 feet back from the screen and 8-9 feet up. Use a heavy-duty ceiling bracket and run your cables cleanly through conduit if possible. Image calibration takes time, but nailing it is absolutely worth every minute spent.
Pro Tips:
4. Hitting Mat and Artificial Turf Flooring
A quality hitting mat separates a real simulator bay from a garage hack job. You want a mat that mimics the feel of different lies – fairway, rough, and tee box – without destroying your irons or your wrists after 200 swings. Mats with gel-filled or foam-based underlayers reduce joint impact significantly compared to basic rubber-only options.
Style the hitting area with artificial turf surrounding the mat for a more realistic, course-like feel, which also protects your floor from errant shots. IMO, going with at least a 5×5 foot mat gives you enough room to move comfortably and work on different shot shapes throughout a session.
Pro Tips:
5. Ceiling Height Considerations

Low ceilings are the number one killer of golf simulator dreams – full stop. Most golfers need at least 9 feet of clearance to swing comfortably, but 10 feet is the real sweet spot for the majority of players. If you’re taller than 6 feet or have a naturally upright swing, push for 11 feet or more to eliminate any mental hesitation at the top of your backswing.
Measure from the floor to the lowest obstruction – that includes beams, lights, ductwork, and ceiling fan blades. If ceiling height is tight, removing a ceiling fan and recessing your lighting can recover 12-18 inches of usable clearance, which is sometimes all you need.
Pro Tips:
6. Side Barrier Nets and Safety Walls

Safety netting is non-negotiable in any well-designed indoor golf simulator space. Golf balls travel at high speeds, and even well-aimed shots deflect unpredictably off mats, screen frames, and equipment. Heavy-duty nylon barrier nets along both sides protect your walls, your gear, and anyone standing nearby during a session.
Install netting that extends at least 6 feet back from your hitting position on both sides, using tension systems that keep the net fully taut against the frame. Some golfers also add a short net panel behind them for shanks and mishits – and yes, we all hit one eventually. 😅
Pro Tips:
7. Lighting Design for Your Simulator Bay
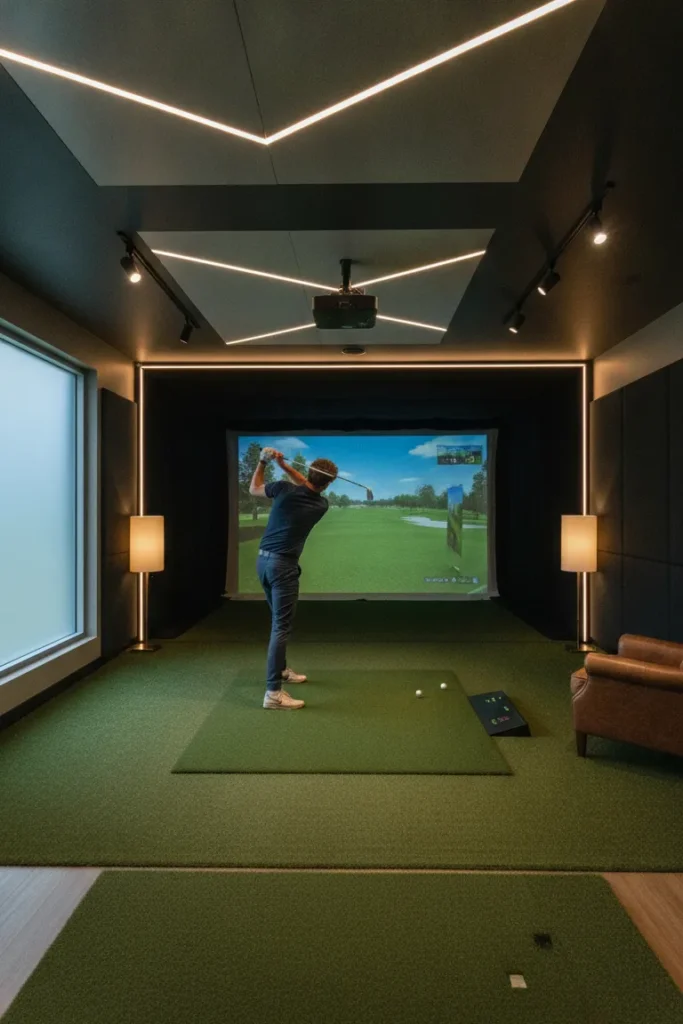
Lighting in a golf simulator room is a total game-changer – and most people underestimate its impact until they get it wrong. You want enough light to see clearly and move safely, but not so much that it washes out the projected image on your screen. The trick is dimmable lighting, so you can adjust brightness based on the time of day and what you’re doing.
LED recessed lights or adjustable track lighting work best for simulator bays, placed around the room perimeter rather than directly in front of the screen. Bias lighting behind your secondary data monitor also reduces eye strain noticeably during long analytical review sessions.
Pro Tips:
8. Sound System and Room Acoustics
A proper sound system transforms your golf simulator bay from a tech setup into a genuine experience. Hearing the crack of the ball, crowd noise, and ambient course sounds through quality speakers adds real immersion to every session. Plus, blasting your playlist between rounds makes the whole thing genuinely enjoyable rather than just a training chore.
Wall-mounted bookshelf speakers or in-ceiling speakers work great in simulator rooms. Treat the walls with acoustic foam panels to reduce echo and improve both audio quality and launch monitor sensor accuracy. Hard, parallel surfaces create sound reflections that mess with both your ears and some radar-based tracking systems.
Pro Tips:
9. Climate Control and Ventilation
Here’s something nobody talks about enough – climate control inside your golf simulator space matters more than people realize. Swinging a club repeatedly generates serious body heat, and a poorly ventilated room gets uncomfortable fast. If your simulator lives in a garage or basement, temperature swings also affect launch monitor sensors and projector lamp performance over time.
Install a mini-split HVAC system for reliable year-round heating and cooling without bulky ductwork running through your room. Alternatively, a portable AC unit paired with a small electric heater covers most climate situations at a fraction of the cost. Keep the room between 65-75°F for comfortable play and to protect your electronics from thermal stress.
Pro Tips:
10. Wall Padding and Ball Protection
Wall padding does double duty in your simulator space – it protects your room from ball damage and adds a polished, professional look at the same time. High-density foam wall tiles covered in turf or vinyl absorb impact reliably and look sharp in any home golf simulator bay. Think of it as wainscoting, but for people who take their short game seriously.
Apply padding along both side walls from the floor to at least 8 feet high through the entire hitting corridor. The back wall behind the golfer is also worth protecting if your room is on the tighter side. Many simulator owners go with a dark color scheme on their padding to keep the room feeling focused, sleek, and professional.
Pro Tips:
11. Equipment Storage Solutions

A cluttered simulator room kills the vibe – full stop. Keeping your clubs, balls, gloves, training aids, and accessories organized makes the whole space feel intentional and easy to step into. Built-in or freestanding golf bag storage racks keep your setup tidy and protect your clubs from falls and everyday scratches.
Wall-mounted pegboards or slatwall panels let you hang training aids, rangefinders, and accessories without eating up valuable floor space. Add a dedicated shelf unit near the room entrance for balls, tees, and gloves so everything you need sits right there when you step in. FYI, labeled storage bins also help a lot when multiple family members share the same simulator space.
Pro Tips:
12. Seating and Spectator Area
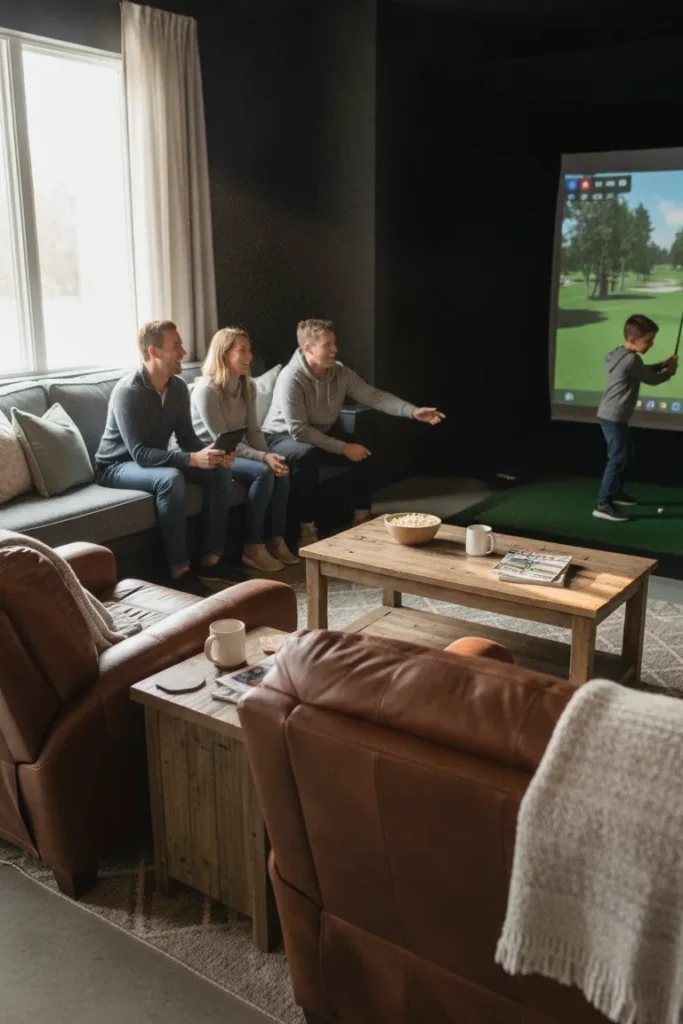
Good seating transforms your simulator room from a solo practice den into a genuine social space. Whether you’re hosting a round with friends or watching your kids work on their game, comfortable seating behind the hitting zone makes the whole experience better. Barstools, stadium-style chairs, or a simple sofa all work, depending on the available space behind your hitting area.
Position seating at least 8-10 feet behind the hitting mat so spectators stay safely outside the swing zone. A raised platform for the seating area is a great touch if ceiling clearance allows – it creates a stadium effect and dramatically improves sightlines to the main screen during longer sim rounds.
Pro Tips:
13. Monitor and Display Screen Setup

Most sim software runs beautifully on your main projector screen, but adding a dedicated side monitor takes your setup to a noticeably higher level. A secondary display lets you view swing data, ball flight analytics, course maps, and shot metrics without squinting at the main projection screen during play. It keeps your eyes on the game while your brain tracks the performance numbers simultaneously.
Mount a 32-43-inch TV or monitor on a side wall or angled arm within easy view of the hitting position. Connect it to your simulator PC via HDMI and configure it as an extended display. Some sim room setups add a third screen for slow-motion video playback – incredibly useful for swing analysis and self-coaching between sessions.
Pro Tips:
14. Launch Monitor Placement and Positioning
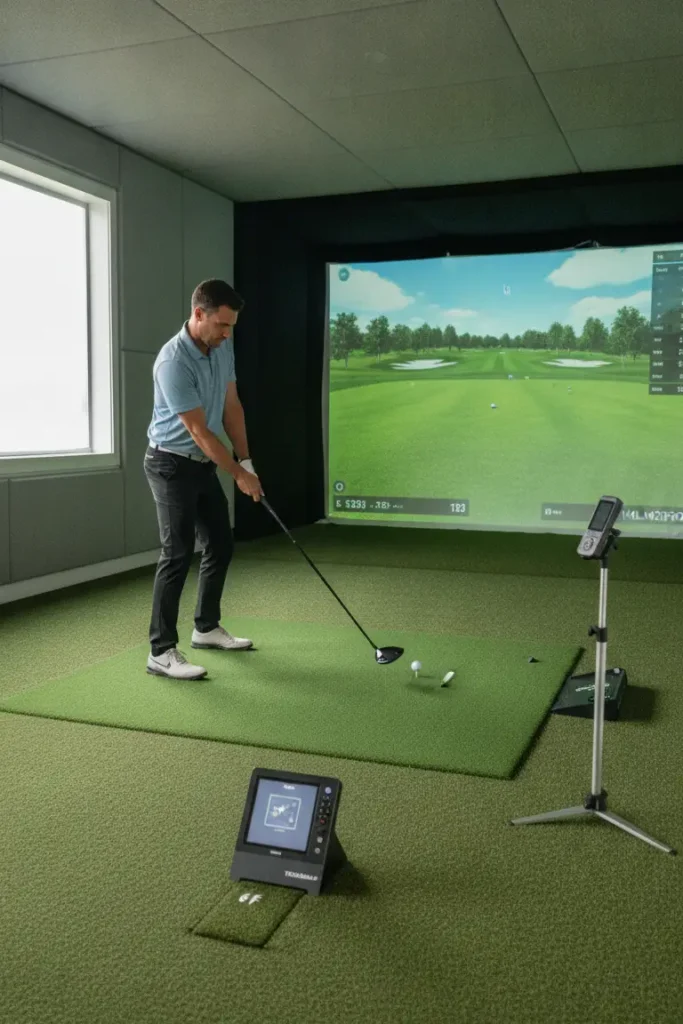
Your launch monitor placement can make or break your data accuracy – and that means everything when you’re using simulation results to improve your actual game. Different launch monitors have specific placement requirements depending on their technology, and ignoring them leads to consistently unreliable numbers. Radar-based units typically sit behind or beside the ball, while camera-based systems often mount overhead or slightly in front.
Read your launch monitor’s manual carefully and follow recommended distances and angles as closely as possible. The hitting mat position, ball placement height, and floor surface all factor into reading quality. Mark the exact launch monitor position on the floor with tape so your setup stays perfectly consistent every single session.
Pro Tips:
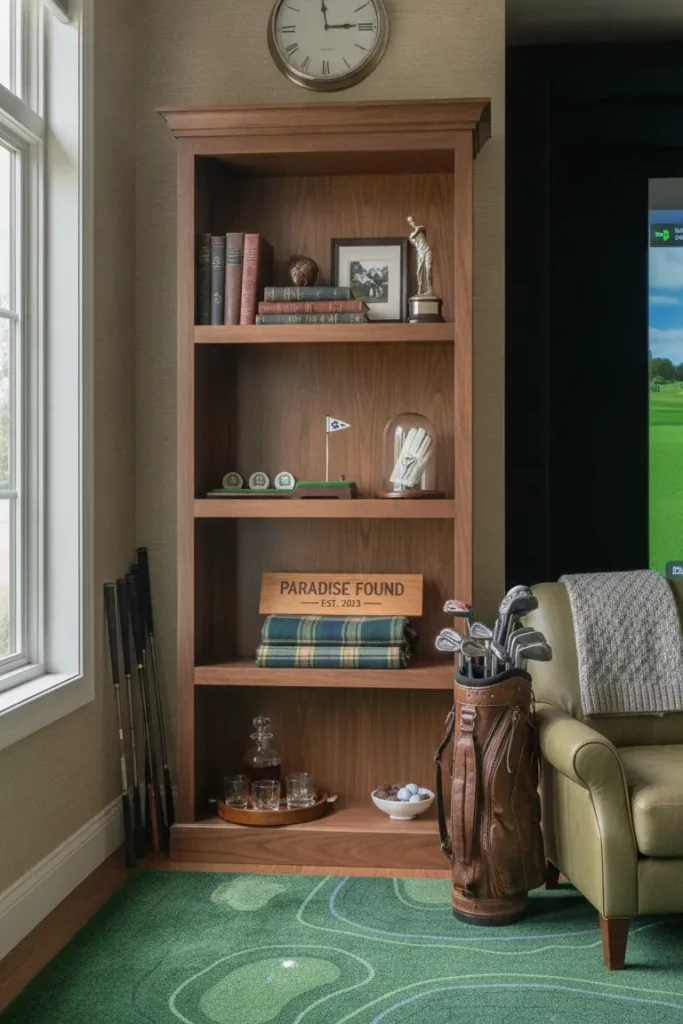
15. Golf-Themed Decor and Ambiance
Decor is where personality meets function in a great golf simulator room design. Go too plain, and the space feels sterile; go too theme-heavy, and it looks like a mini-golf gift shop exploded in your basement. The sweet spot is clean, course-inspired elements that feel intentional – framed course maps, memorabilia, subtle green tones, and natural wood accents hit that balance just right.
Hang framed prints of iconic holes like Augusta National’s 12th or Pebble Beach’s 18th to anchor the room’s theme. Use a consistent palette of navy, forest green, and warm wood tones for a look that always feels sharp. A chalkboard or whiteboard wall section doubles as a casual scorecard space and adds real clubhouse character to your setup.
Pro Tips:
16. Flooring Beyond the Hitting Mat

The floor outside your hitting mat deserves real attention, too – not just the bay itself. Durable, easy-to-clean flooring that handles golf shoes, dropped clubs, and the occasional spilled drink makes your whole simulator space practical and polished. Luxury vinyl plank (LVP) flooring is a top choice – affordable, water-resistant, and available in wood-look styles that complement a sport-focused interior perfectly.
Run artificial turf strips from the hitting mat into the room’s walking areas to reinforce that indoor golf course aesthetic throughout the full space. Rubber-backed utility rugs work well in seating areas to add comfort underfoot. Whatever you choose, keep the floor surface non-slip throughout – especially important in a room where people wear golf shoes.
Pro Tips:
17. Bar or Refreshment Station
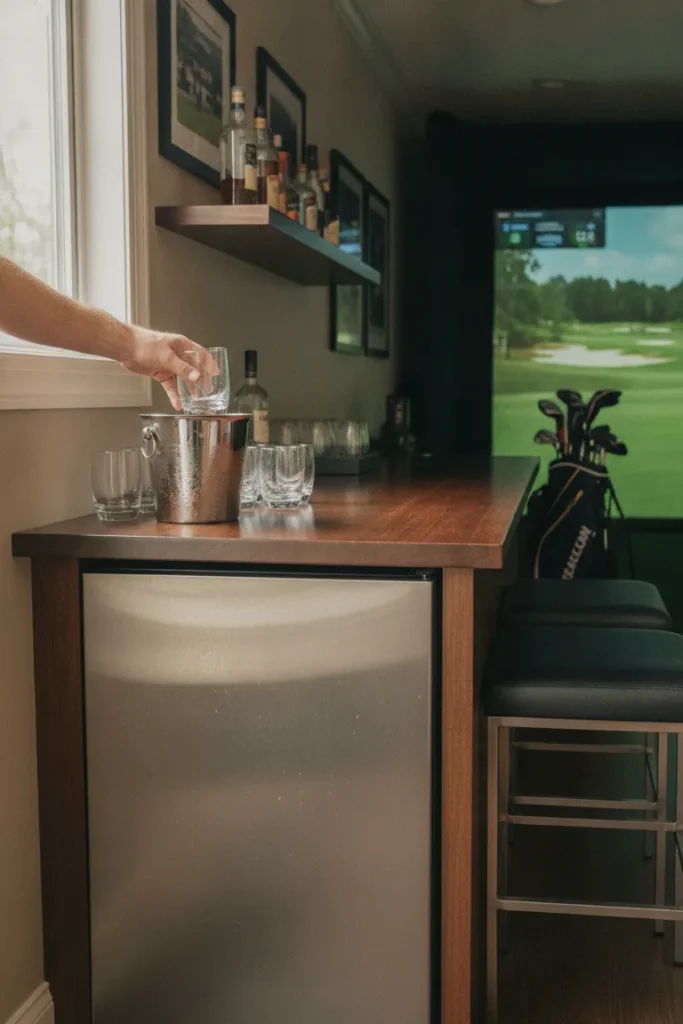
Let’s be straight about this – a built-in bar or refreshment station makes your golf simulator room the most popular room in the entire house. A compact mini-fridge, a countertop, and a few barstools turn your practice space into a social hub that people genuinely want to spend time in. You’ll suddenly find a lot more friends interested in watching you work on your wedge game.
Set up the refreshment area on the back or side wall, well clear of the hitting zone. Include a small sink if plumbing is accessible, or run a cooler-and-countertop combination as a simpler, budget-friendly alternative. Keep glassware in an enclosed cabinet to protect it from both stray ball deflection and room vibration over time.
Pro Tips:
18. Smart Home and Tech Integration

Integrating smart home tech into your golf simulator room takes daily convenience to a completely different level. Imagine walking in and saying, “Alexa, start golf mode” – lights dim to your preferred level, the projector fires up, your simulator software loads, and your playlist kicks in automatically. That level of automation is genuinely achievable with today’s smart home platforms and a little planning.
Use smart plugs to automate your projector and simulator PC startup sequence, saving you the hassle of switching things on manually every session. Smart lighting systems like Philips Hue or Lutron Caseta let you build custom scenes for different room functions – bright for cleaning up, dimmed for playing, and completely off when not in use.
Pro Tips:
19. Cable Management and Clean Wiring

Nothing ruins a well-designed room faster than a rat’s nest of cables hanging everywhere. Your simulator setup involves a projector, launch monitor, PC or console, speakers, a side display, and lighting – all of which need power and data connections running cleanly throughout the space. Running cables through walls, ceiling conduit, or surface-mounted raceways makes a massive, immediately visible difference in how polished and intentional your room looks.
Plan your complete cable routing before you install anything in the room. Run HDMI and power cables through ceiling conduit for the overhead projector, and use floor channels or wall raceways for equipment near the hitting mat. Label every single cable at both ends with a cable label maker – future you will be extremely grateful for that small effort.
Pro Tips:
20. Scoreboard and Leaderboard Display

Adding a scoreboard or leaderboard display is the finishing touch that makes every session in your golf simulator room feel genuinely competitive and worthwhile. Whether you’re tracking multi-round stats against friends or monitoring your own improvement week over week, having a visual scoreboard on the wall brings real clubhouse energy to the entire space.
Use a large chalkboard, magnetic whiteboard, or secondary digital display mounted near the seating area to track scores in real time throughout each round. Some simulator software outputs live leaderboard data you can mirror directly to a dedicated screen. Even a simple whiteboard with a custom golf score template adds real personality and keeps the competitive spirit alive during every session.
Pro Tips:
Make Your Indoor Golf Room a Reality
Building a great golf simulator room design isn’t about throwing the most money at it – it’s about planning thoughtfully and making smart decisions in the right order. Start with your space dimensions and ceiling height, lock in your impact screen and projector setup, then layer in comfort, aesthetics, and tech from there. Every single idea on this list adds something real and meaningful to your overall simulator experience.
Whether you’re converting a garage, a basement, or a spare bedroom, these ideas scale to practically any budget and any footprint. Pick the elements that fit your priorities, start with the core fundamentals, and build the fun stuff in over time. Your ideal indoor golf setup is genuinely closer than you think – and now you have a clear roadmap to get there.
Save this article, share it with your golf buddies, or pull it up the next time you’re ready to take your simulator room to the next level.
Frequently Asked Questions
Most simulators need at least 10 feet wide, 15 feet deep, and 9 feet of ceiling clearance for comfortable full swings. Larger is always better, and a 12x20x10-foot space is considered a comfortable, realistic ideal for the majority of golfers.
Costs range widely, depending on equipment and finish quality. A basic home golf simulator setup can start around $2,000-$5,000, while premium builds with high-end launch monitors, professional screens, and full room finishing can run $20,000 or more. Most serious enthusiasts land somewhere in the $5,000-$15,000 range for a solid mid-tier build.
Yes – garages are one of the most popular locations for home golf simulator builds. You’ll need to address insulation for year-round temperature control, proper lighting, and ceiling clearance. Attached garages with 10-foot ceilings work especially well for most swing types and simulator configurations.
It depends on your budget and performance goals. The Garmin Approach R10 offers strong value at the entry level, while the Bushnell Launch Pro and Trackman deliver professional-grade accuracy at a premium price point. Most serious home sim builders land on mid-range options like the Uneekor EYEXO or Foresight GC3 as their primary launch monitor.
Not always. Many golfers successfully build out their own simulator rooms using manufacturer guidelines and community resources online. However, for any electrical work, in-wall cable routing, or structural ceiling mounting, hiring a licensed professional is worth the cost for both safety and long-term quality.