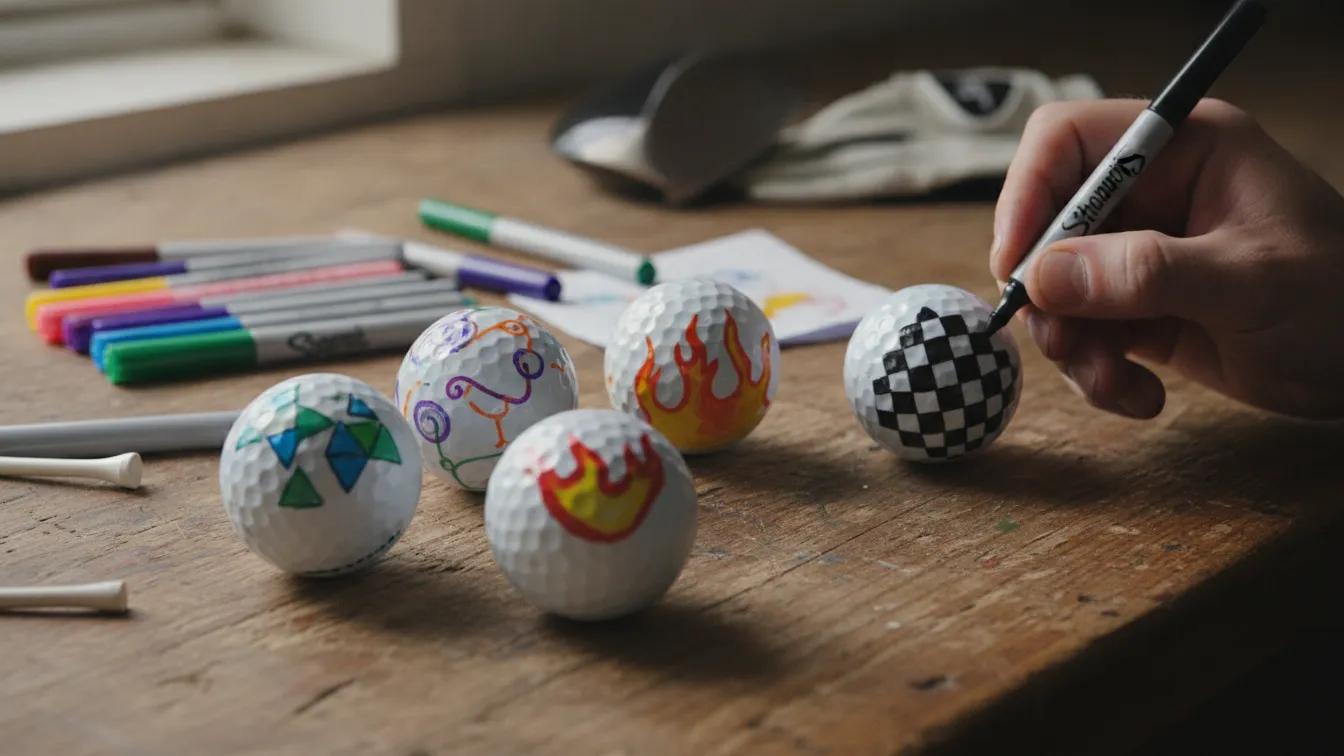
Ever stared into a pile of white golf balls and wondered which one is actually yours? Yeah, we’ve all been there – and it’s more frustrating than a double bogey on a par 3. Marking your golf ball with golf ball designs Sharpie easy techniques is hands-down one of the smartest, most creative things you can do before teeing off. It solves a real problem AND gives your gear a little personality.
This guide is for golfers of every level – weekend warriors, beginners, or anyone who just wants their ball to look a little less generic. You’ll learn 15 creative Sharpie design ideas you can actually pull off, with tips on technique, what works best, and how to make your mark stand out on the fairway. No art degree required, promise.
Simple Dot Cluster Pattern
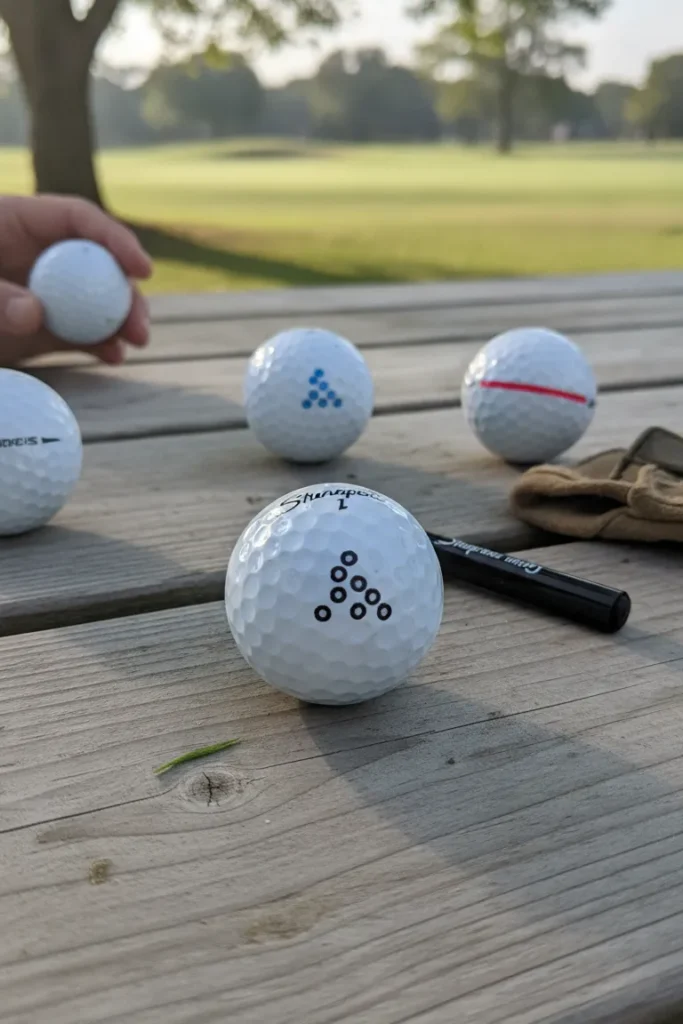
A dot cluster is basically the easiest Sharpie golf ball design you can do – even if your artistic skills peaked in kindergarten. You place a small grouping of dots in a triangle or circle shape on the ball, creating a subtle but distinctive mark that’s easy to spot from a distance.
Grab a fine-point black Sharpie and press lightly to make clean dots without smearing. Three to five dots in a tight cluster near the number works perfectly. This suits players who want a clean, minimal look without any fuss.
Pro Tips:
• Use a fine-tip Sharpie (not a chisel tip) for clean, precise dots
• Let the ink dry 30 seconds before touching – smudges ruin the effect
• Add a second color dot in the center for extra visibility
Single Bold Line Around the Equator
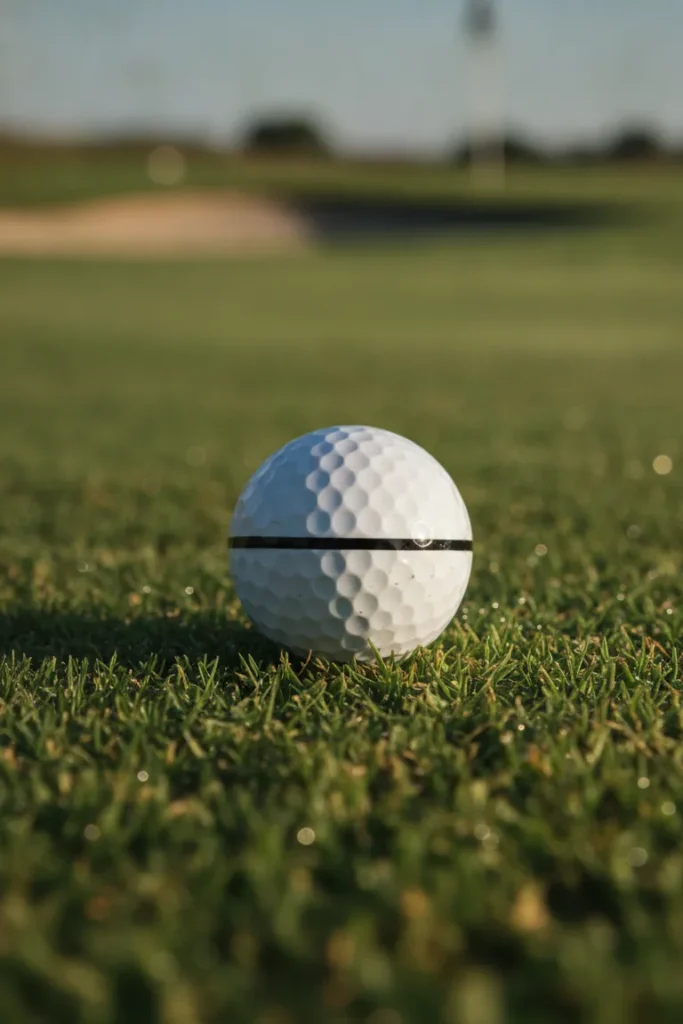
This is probably the most popular golf ball marker design out there, and for good reason – it doubles as an alignment aid AND a personal identifier. You draw one continuous line all the way around the ball’s equator using a ruler or coin as a guide.
Roll the ball slowly against a ruler edge and trace with a medium Sharpie in one smooth motion. Try red or blue for visibility. This works brilliantly for putters who want help lining up on the green – two birds, one Sharpie.
Pro Tips:
• Use a ball marking tool or coin to keep your line perfectly straight
• A red Sharpie shows up better against white than black in some lighting
• Draw the line before your round so it has time to set overnight
Initials or Monogram
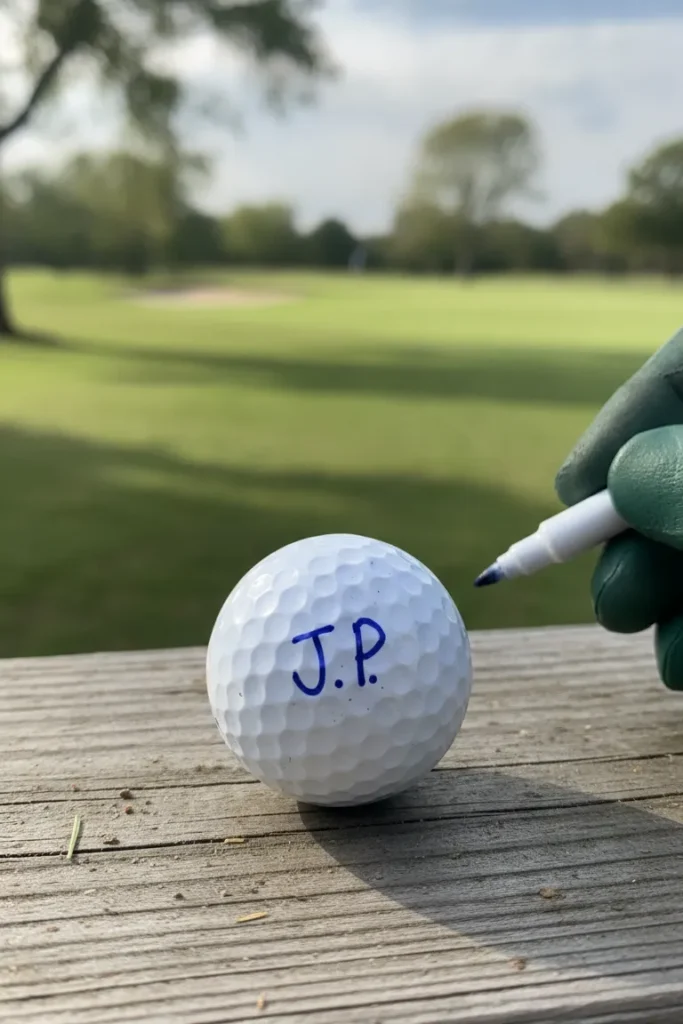
Your initials on your ball – classic, simple, and totally personal. This is one of those easy golf ball marking ideas that every player should try at least once. Neat block letters or a stylized monogram instantly make the ball yours, and nobody’s going to argue over who owns the “J.B.” ball in the rough.
Write your initials in bold block letters with a medium-point Sharpie. Keep letters under half an inch so they fit cleanly. A monogram style with the last initial larger in the middle looks especially sharp.
Pro Tips:
• Practice the letters on paper first to dial in your sizing
• Use a stencil cut from cardstock if your freehand writing isn’t clean
• Outline the letters with a thin line after filling for a polished, finished look
Smiley Face or Simple Emoji
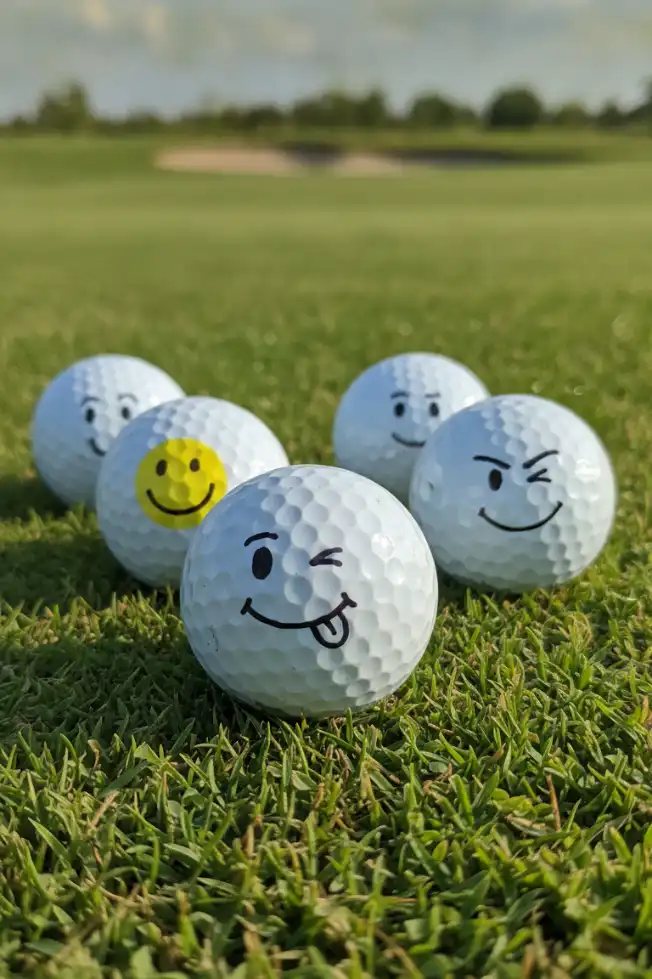
Who says your golf ball can’t have a personality? 😄 A tiny smiley face is one of the most recognizable custom golf ball marker designs out there – kids love it, adults love it, and it absolutely messes with your playing partners. Nothing says “I’m relaxed out here” like a grinning ball rolling into the cup.
Draw two small circles for eyes and a curved line below with a fine-tip Sharpie. Keep it small – about the size of a pea for the face. Add eyebrows or a winking expression if you’re feeling bold.
Pro Tips:
• Fine-tip Sharpies give you the control you need for small facial features
• Add rosy cheeks using a light pink Sharpie for extra character
• Make each ball slightly different – winking, laughing, surprised – so you can tell multiples apart
Star Pattern
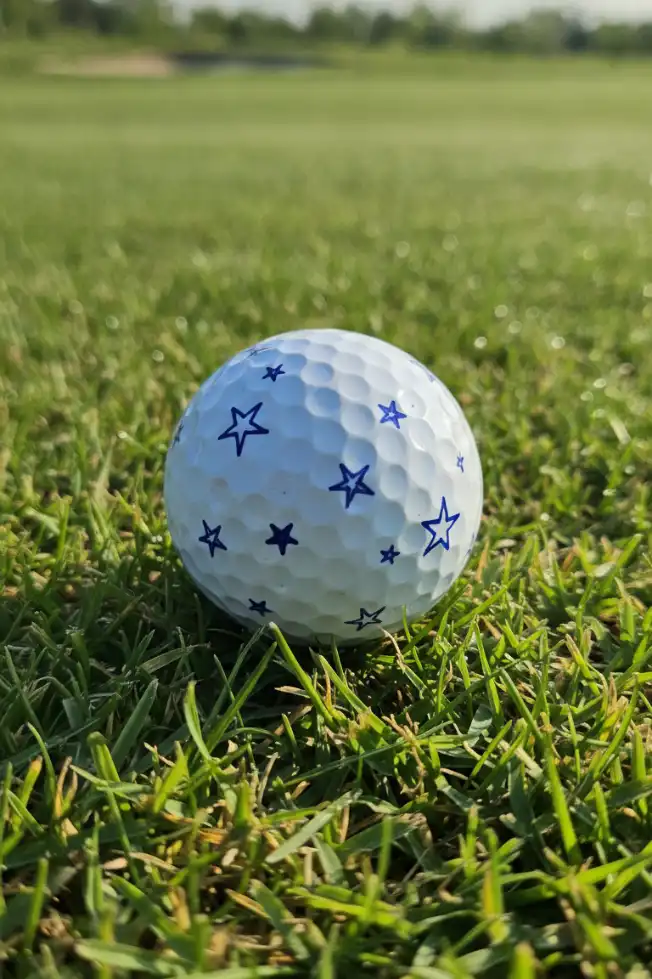
A small hand-drawn star is one of those DIY golf ball designs that looks harder than it is. Five quick lines meeting at a center point and you’ve got a recognizable, sharp-looking mark that reads clearly from any angle. Stars have been a go-to marker for golfers for years because they’re bold and instantly distinctive.
Draw a quick five-point star with a medium Sharpie. Fill it in solid for a bold look, or just outline it for something more delicate. Position it next to the ball number so it doesn’t interfere with any existing print.
Pro Tips:
• Use a star stencil if your freehand version looks more like a blob
• A gold or yellow Sharpie star on a matte ball looks genuinely premium
• Double stars (one outlined, one filled) work great for telling multiple balls apart
Zig-Zag Band

A zig-zag band wrapped around the middle of your ball looks like something off a premium designer ball – and it takes about 45 seconds to draw. This creative golf ball marking technique creates a bold visual pattern that’s easy to spot in the rough, in sand, or rolling across the green.
Use a fine or medium Sharpie and draw connected triangles or sharp V-shapes around the equator. Go for alternating colors – like red and blue – for a striped effect that really pops. This works especially well on matte-finish balls.
Pro Tips:
• Rotate the ball slowly and evenly as you draw to keep your zigzags consistent
• Limit yourself to 8-10 peaks around the ball to avoid crowding
• Try a two-tone version using a black Sharpie for the outline and a color to fill alternate sections
Arrow Alignment Line
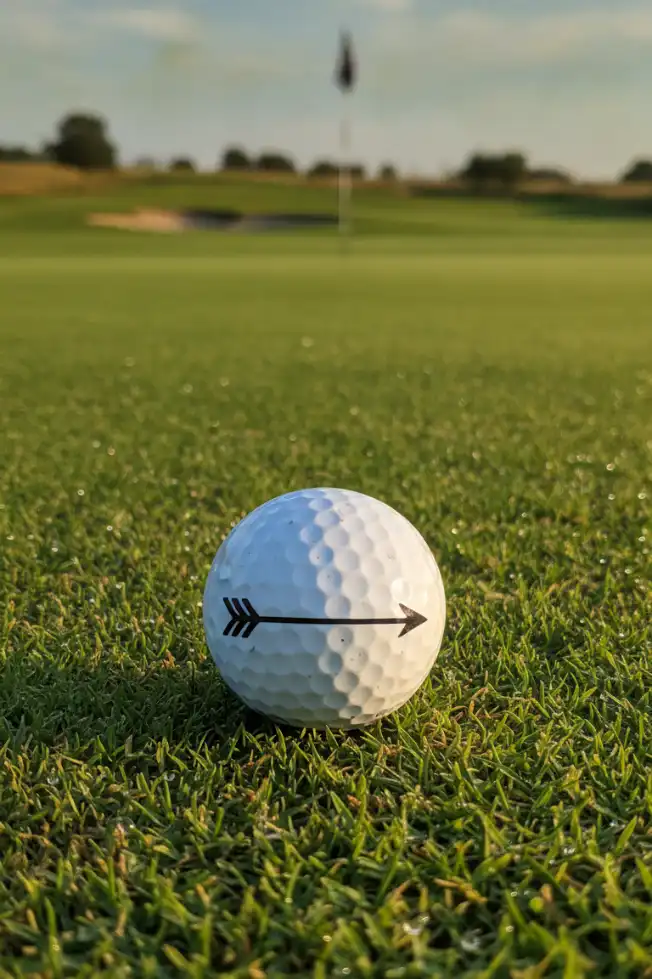
This one is less about aesthetics and more about function – but when your putts start dropping, you’ll be glad you drew it. An arrow-tipped alignment line is one of the most practical golf ball Sharpie ideas for serious players. It gives you a visual cue for lining up putts and adds a clean, professional look to your ball.
Draw a straight line with a pointed arrow at one end using a medium Sharpie. Some players add a shorter line perpendicular to create a T-shape for even more precision. Combine it with your initials on the opposite side and your ball looks almost store-bought.
Pro Tips:
• Draw the line through the ball’s number for a built-in reference point
• A double-arrow (pointing both ways) helps you align from either end of the ball
• Red or orange arrows show up better in low-light conditions like early morning rounds
Flower or Daisy Design
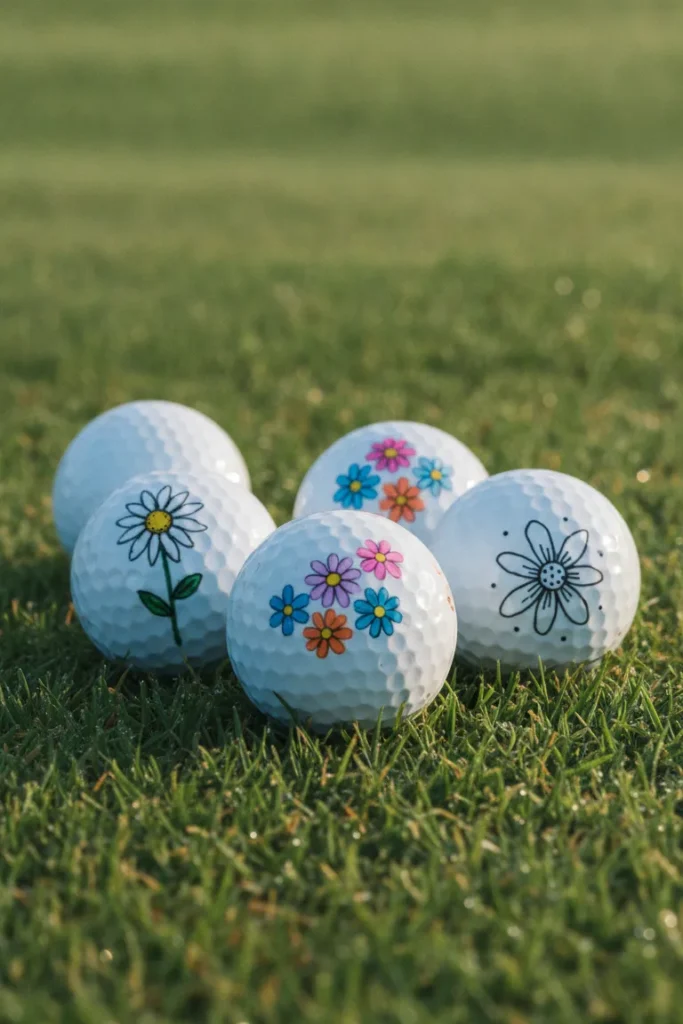
If you want something that’s actually beautiful and unique, a simple daisy or flower design is surprisingly easy to pull off with a Sharpie. Each petal is just a small oval or teardrop shape radiating from a center dot – that’s it. This is a great personalized golf ball idea for players who want something genuinely different from the usual lines and initials.
Draw a small circle as the flower center, then add 5-6 petal shapes around it. Fill the center with yellow and leave petals white with an outline, or reverse it for a bold look. A purple or pink Sharpie for the petals makes this design truly stand out.
Pro Tips:
• Keep the whole design within a half-inch circle so it stays clean and doesn’t overwhelm the ball
• Use a colored Sharpie for the center and black for the petal outlines for contrast
• Multi-petal flowers with alternating filled and outline petals look impressively detailed
Four-Leaf Clover
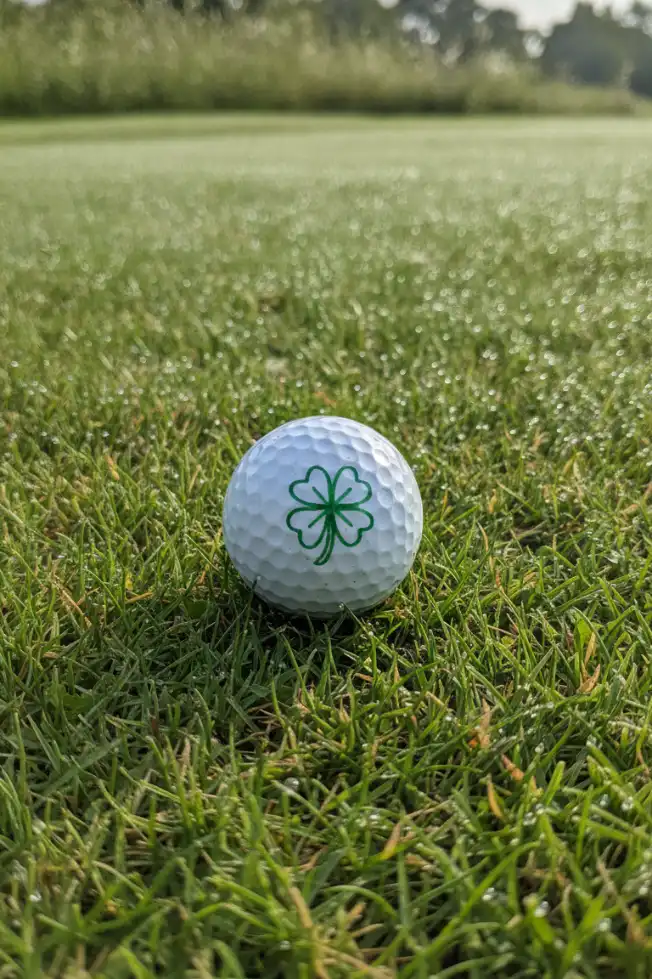
Playing a round where you need all the luck you can get? Draw a four-leaf clover on your ball and at least you’ve got the superstition covered. This is one of those golf ball artwork ideas that’s both meaningful and genuinely easy to execute – four rounded leaves in a cross pattern and you’re done.
Sketch four small oval or heart shapes meeting at a central point to form the clover. A green Sharpie is the obvious choice here, but black outlines with green fill look especially clean. Add a tiny stem at the bottom to complete the look.
Pro Tips:
• Heart shapes rotated to meet in the middle form a perfect clover every time
• Outline in black and fill with green Sharpie for the most polished finish
• A tiny “No. 1” below the clover makes this design feel personal and lucky
Lightning Bolt
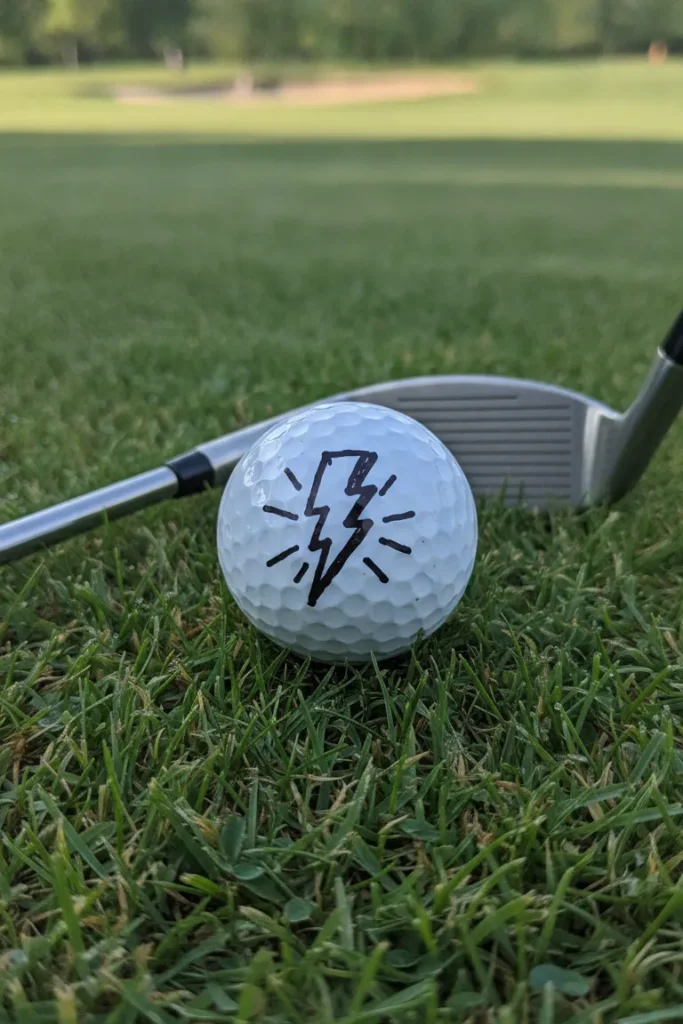
Bold, fast, easy – the lightning bolt is one of the best simple golf ball Sharpie designs for players who want their mark to have a bit of attitude. A single or double bolt screams “I’m going to stripe this drive 300 yards” energy, even if your actual handicap says otherwise.
Draw a thick Z-shaped angled line or the classic David Bowie-style bolt. Yellow or orange Sharpies on white balls create serious pop from any distance. Position it on the side of the ball opposite the number so both marks stay visible.
Pro Tips:
• A thick-tipped Sharpie gives the bolt its bold, chunky look
• Double bolts side by side look especially aggressive and are easy to spot in rough
• Outline the bolt in black after filling it in with yellow for a comic-book style effect
Crosshatch or Grid Pattern
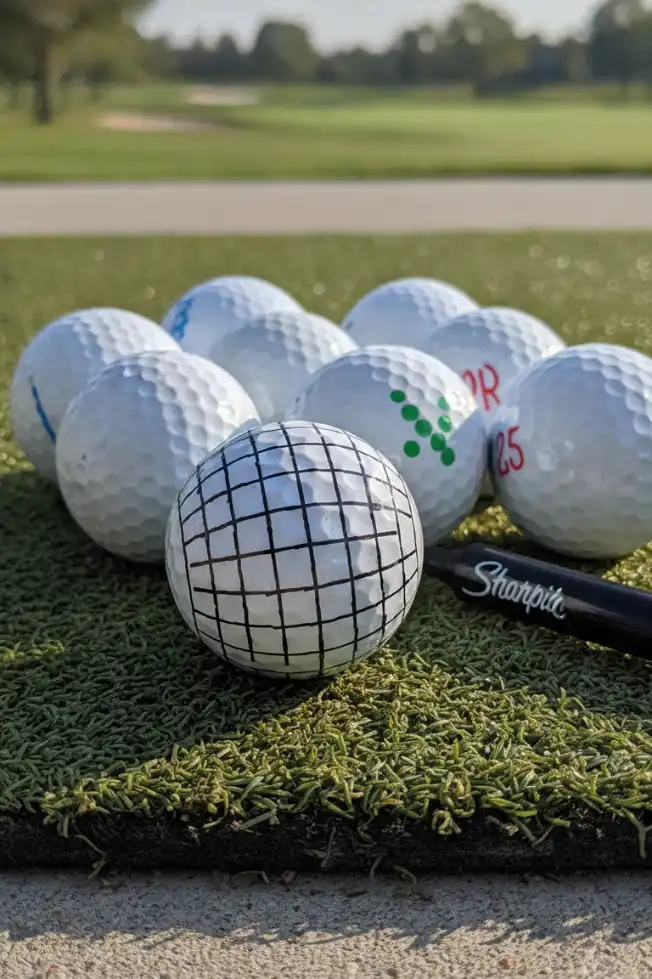
A crosshatch or small grid on your ball looks technical and precise – like you did actual drafting to get there. In reality, it’s just parallel lines crossed over each other, and any golfer with a steady hand can pull it off. This DIY golf ball decoration gives your ball a textured, detailed appearance that reads like something from a premium brand.
Draw 4-5 evenly spaced parallel lines, then cross them with another 4-5 lines at a slight angle. Keep the grid small – about the size of your thumbnail – and place it near the pole of the ball. Black on white looks the crispest.
Pro Tips:
• Draw all lines in one direction first, then rotate the ball and add the cross-lines
• A ruler or straight edge gives you perfectly even spacing without much effort
• Add a circle border around the grid to contain it and make it look even more intentional
Small Number + Symbol Combo
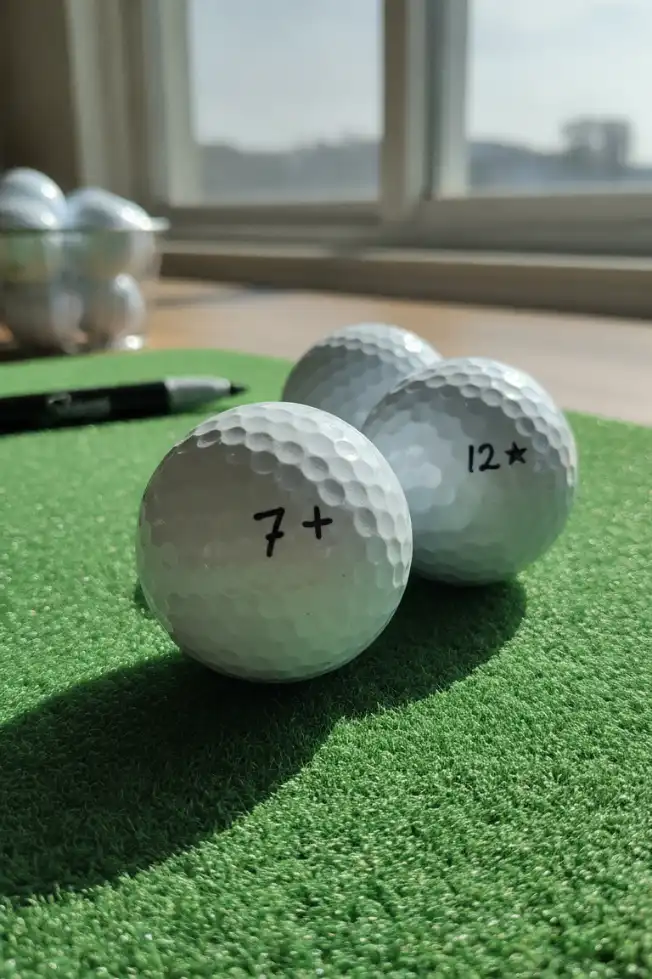
Here’s a practical golf ball identification tip that also looks great: pair your preferred lucky number with a small symbol like a heart, star, or checkmark. “7♥” or “3★” instantly distinguishes your ball from every other ball on the course and takes five seconds to draw.
Write your number (one to two digits max) in bold with a medium Sharpie, then draw a small symbol directly after it. Keep the combo under half an inch wide so it fits cleanly next to the printed ball number. FYI – this is the go-to marking system for golfers who play multiple balls per round.
Pro Tips:
• Use two different Sharpie colors – one for the number, one for the symbol – to add another layer of differentiation
• Stick to the same combo every round so you never second-guess which ball is yours
• Circle the number+symbol combination with a thin ring to tie the design together
Mini Flag or Country Outline
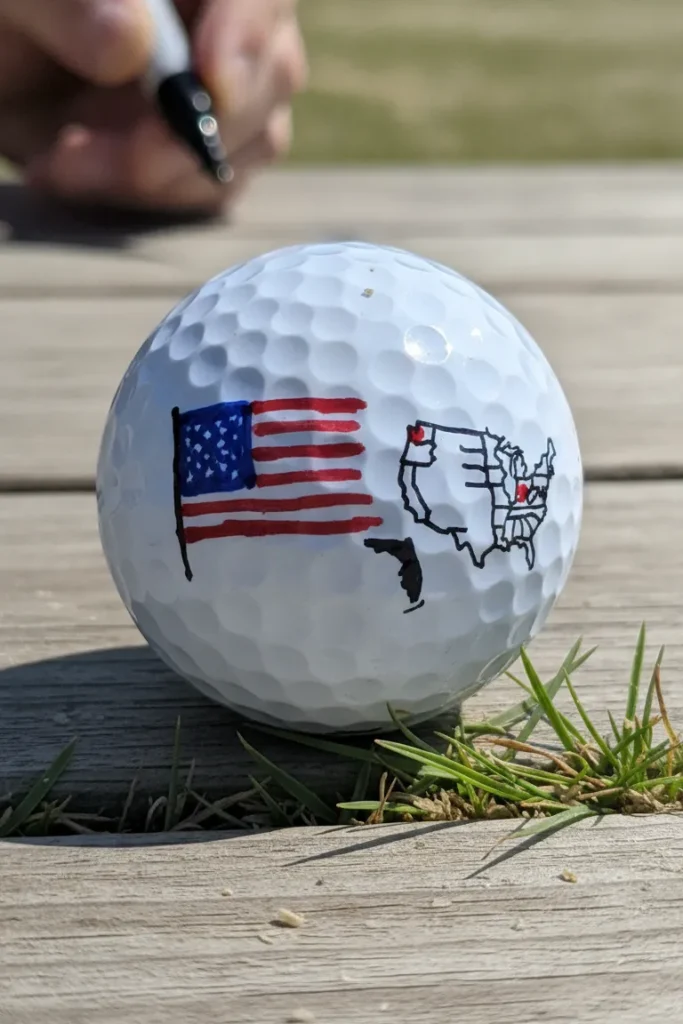
This one is a little more creative, but still 100% doable with a steady hand and a fine Sharpie. Drawing a tiny flag or the rough outline of your home country adds a personal, story-driven element to your ball. It’s a great conversation starter and a subtle way to represent where you’re from – especially if you play in golf societies or international competitions.
Sketch a simple flag rectangle with lines for stripes, or trace a rough outline of a country shape you know well. Simple flags like Japan (white with a red circle) or the UAE (red, white, green stripes) are the easiest to replicate at small scale.
Pro Tips:
• Simplify – you’re working on a curved surface less than 1.5 inches wide, not a canvas
• Practice the flag on a flat piece of paper first to get the proportions right
• Gold Sharpie accents on flag designs look genuinely impressive on the course
Wavy Lines or Ocean Pattern

Wavy lines running around your ball create a hypnotic, flowing pattern that looks artistic without requiring much skill. This creative marker art on golf balls style is especially popular with players who love the beach or surfing vibe. Three or four parallel wavy lines across the ball evoke an ocean pattern that’s both visually interesting and easy to spot in grass.
Draw 3-4 gently curved horizontal lines across one side of the ball using a blue or teal Sharpie. Vary the amplitude of each wave slightly so they look organic and natural rather than robotic. Leave some white space between waves for a cleaner effect.
Pro Tips:
• Draw from left to right in one smooth stroke per wave – don’t sketch back and forth
• Alternate between a thicker and thinner line for visual rhythm
• Add a tiny sun or cloud above the waves for a complete mini-scene that looks genuinely cool
Personal Logo or Brand Mark
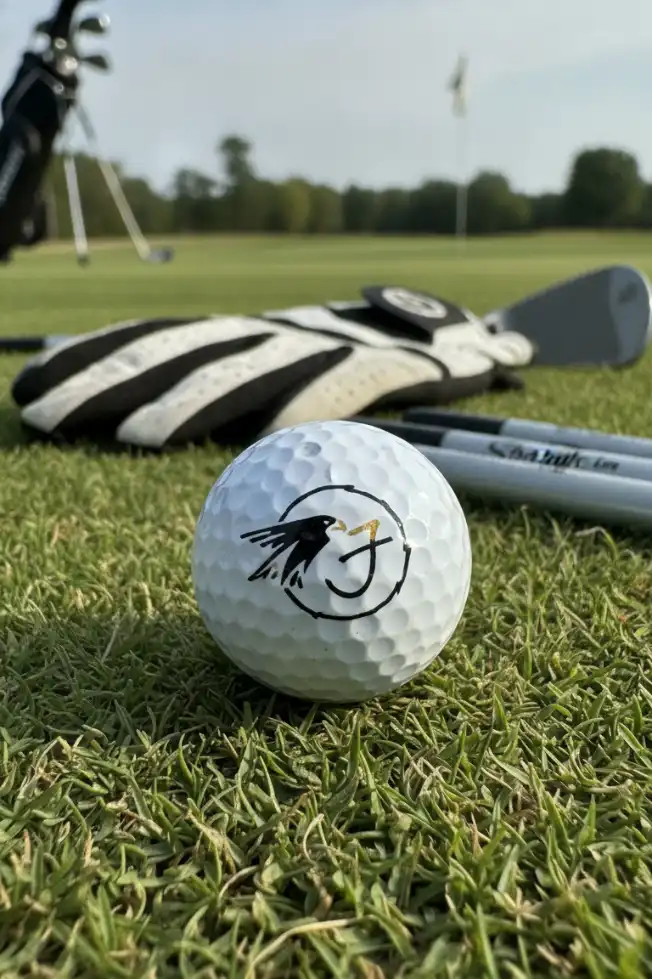
IMO, this is the peak of custom golf ball artwork – creating a simplified version of your own personal logo or brand mark. If you have a business, initials arranged in a specific way, or a symbol you’ve been using for years, shrinking it down onto a golf ball is surprisingly satisfying and makes your gear feel completely your own.
Sketch your logo in pencil on paper first, then simplify it to its most basic elements – think icon, not full logo. Trace it onto the ball with a fine-tip Sharpie, starting with the outline and adding interior detail last. Three to four elements max keeps it clean at small scale.
Pro Tips:
• Simpler is always better at golf ball scale – drop any fine detail that won’t read clearly
• Use a lightbox or tape your paper design to a window and hold the ball up to trace it (seriously, this works)
• Black outline with one accent color is the most readable combination on a white ball
Wrapping It All Up
There you go – 15 golf ball designs Sharpie easy enough for anyone to try before your next round. From simple dots and initials to full custom logos and ocean patterns, there’s no reason your ball should look like every other one on the course. The best part? A quality Sharpie set costs less than a sleeve of premium balls, and these designs take minutes, not hours.
Pick one or two ideas that match your personality, grab a fine-tip Sharpie, and mark those balls tonight so they’re ready to roll tomorrow morning. Save this post, pin your favorite design, or send it to your golf buddy who keeps accidentally hitting your ball. 🏌️ You’ve got the ideas – now go make your mark (literally).
Frequently Asked Questions
No – a standard Sharpie leaves only surface ink and doesn’t affect the ball’s core, compression, or flight characteristics. The USGA actually permits marking balls with permanent markers in official play.
On a standard urethane or surlyn-cover ball, a Sharpie design typically lasts for an entire round and often longer. Scuff marks and rough contact can fade the design, but a clean shot rarely removes ink.
Fine-point or ultra-fine-point Sharpies give you the most control for detailed designs. For bold lines and alignment marks, a medium-tip works great. Avoid chisel tips – they’re too wide for golf ball work.
Yes – marking your ball with any permanent marker for identification is allowed under golf rules, including colored ink. Just make sure you can identify your ball positively and record the markings on your scorecard if required.
Rubbing alcohol on a cotton ball can lighten or partially remove Sharpie ink from a golf ball without damaging the cover. It won’t erase completely, but it can clear enough space to re-mark.